
If you've just brought a Roku streaming device and can't wait to start watching your favorite shows, the first step is getting it connected to your TV. Whether you have a Roku Express, Streaming Stick, or Ultra, the most reliable way to hook it up is with an HDMI connection. How to connect Roku to TV with HDMI? Get started with the easy setup guide now.
Roku HDMI Setup: What You'll Need
Before we begin, here's what you'll need for a smooth Roku setup on any TV. Most of the items come included with your Roku device, but it's good to understand what each one does and why you need it:
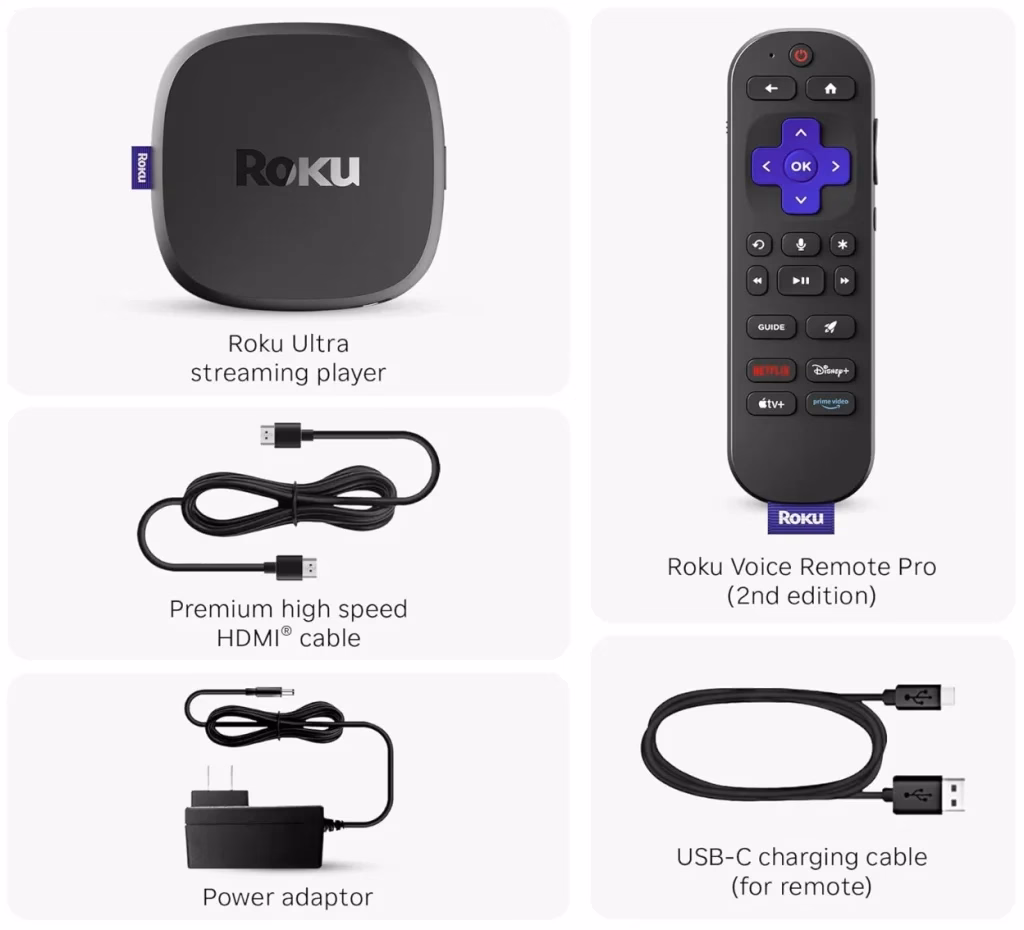
A Roku Device
The Roku streaming device is the primary streaming unit that converts your TV into a smart entertainment center. Depending on the model, it may resemble a small box (Roku Express), a stick (Roku Streaming Stick), or a more advanced device (Roku Ultra).

The Streaming Stick is the most compact option and plus directly into your TV's HDMI port, ideal for wall-mounted TVs or minimal setups. The Express and Ultra models are better suited if you prefer a small box you can tuck near your TV stand, but they do require an HDMI cable.
(You might be interested in: Roku Express vs. Stick: Which One Is Better? [Full Roundup])
If you have a non-smart TV, connecting a Roku streaming device to it provides instant access to popular streaming platforms, including Netflix, Hulu, YouTube, and more.
Note: Most Panasonic TV remotes are IR-based. Therefore, you should ensure that there is a clear line of sight between the remote and your Panasonic TV while using the remote.
An HDMI Cable (If Required)
Most Roku devices (like Roku Ultra and Express) need to be connected to your TV using an HDMI cable. This cable transmits both high-definition video and audio from the Roku to your TV.
If you're using a Roku Streaming Stick, it already has a built-in HDMI plug; hence, there is no separate cable needed.
A TV with at Least One Free HDMIInput
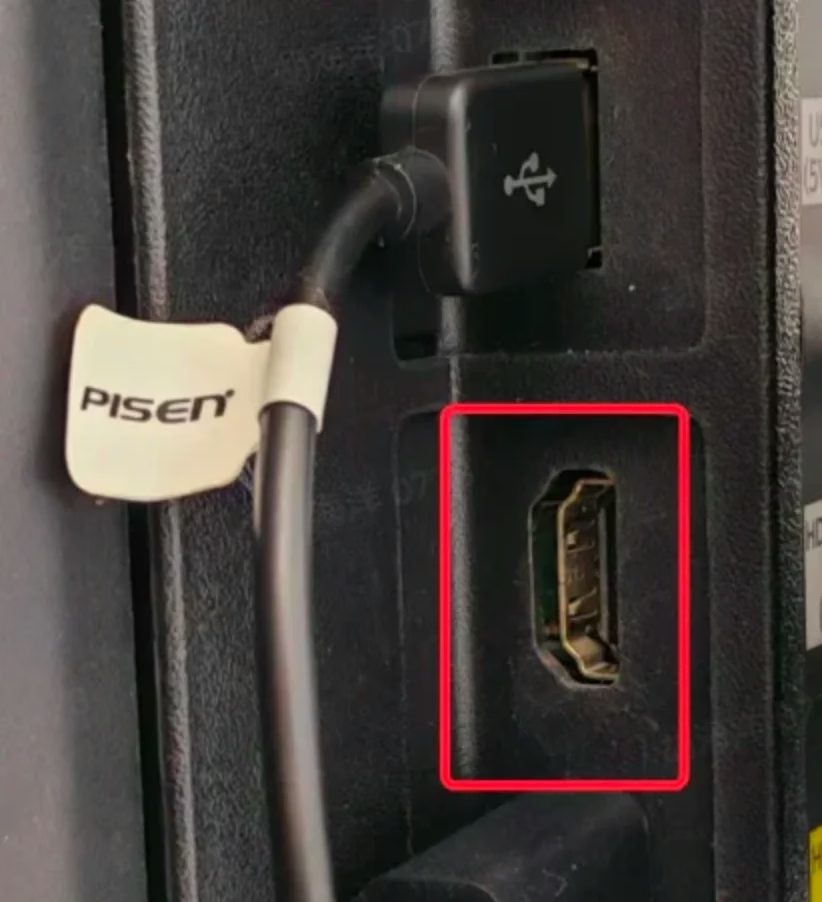
Your TV needs to have an open HDMI port where you can connect your Roku. Most modern TVs have at least one, usually labeled "HDMI 1", "HDMI 2", etc.
An HDMI Cable (If Required)
Most Roku devices (like Roku Ultra and Express) need to be connected to your TV using an HDMI cable. This cable transmits both high-definition video and audio from the Roku to your TV.
If you're using a Roku Streaming Stick, it already has a built-in HDMI plug; hence, there is no separate cable needed.
A TV with at Least One Free HDMIInput
Your TV needs to have an open HDMI port where you can connect your Roku. Most modern TVs have at least one, usually labeled "HDMI 1", "HDMI 2", etc.
A Power Source
Your Roku needs power to function. You can plug it into a wall outlet using the included power adapter, or in some cases, power it through your TV's USB port. However, not all TVs provide enough power via USB, especially for devices like the Roku Ultra, which raises the issue Roku not working; therefore, a wall outlet is generally the most reliable choice.
Roku Remote with Batteries
A Roku remote is your main way to interact with Roku. It lets you navigate menus, select apps, adjust the volume, and more. Most Roku devices come with a remote, like Roku Simple Remote and Roku Voice Remote.
What you need to do is insert a set of fresh batteries into your Roku remote, or the remote is fully charged before Roku HDMI setup begins.
How to Connect Roku to TV with HDMI: Step-by-Step Guide
Once you've got everything ready from the checklist above, connecting your Roku to TV is super easy. The whole process requires no tech skills, friendly to beginners. Just follow these four simple steps:
Step 1. Plug the Roku into Your TV's HDMI Port
How to hook up Roku to TV with HDMI? Just take your Roku streaming device and plug it into one of the available HDMI ports on your TV. Plus, make a mental note of which one you're using, HDMI 1 or HDMI 2, which you'll need in the next step.
Step 2. Power Up Your Roku Device
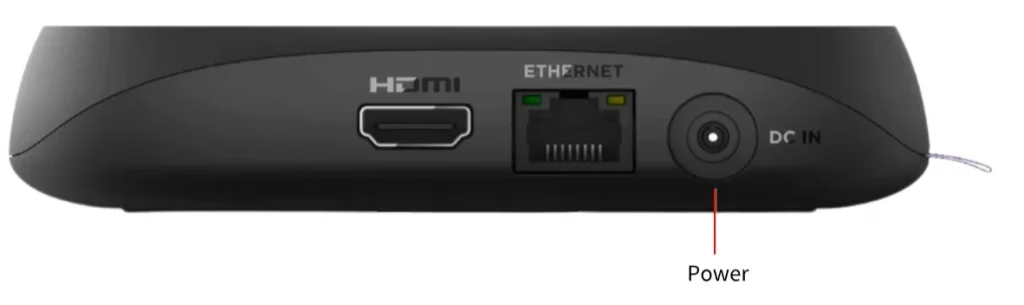
Connect Roku's power cable to the device. Then, plug the other end into a wall outlet using the included power adapter, or if your TV has a USB port and supports enough power, you can plug it there instead. We recommend using the wall outlet for a more stable power supply, especially with Roku Ultra or older TVs.
Once connected, your Roku device should power on automatically, which is usually indicated by a small light on the front.
Step 3. Turn On Your TV and Choose the HDMI Input
First, turn on your TV using the TV remote (not the Roku remote). Then, press the Input or Source button on the remote and choose the HDMI input where you plugged in the Roku. For example, if you plugged the Roku into HDMI 2, choose HDMI 2 as your input source.
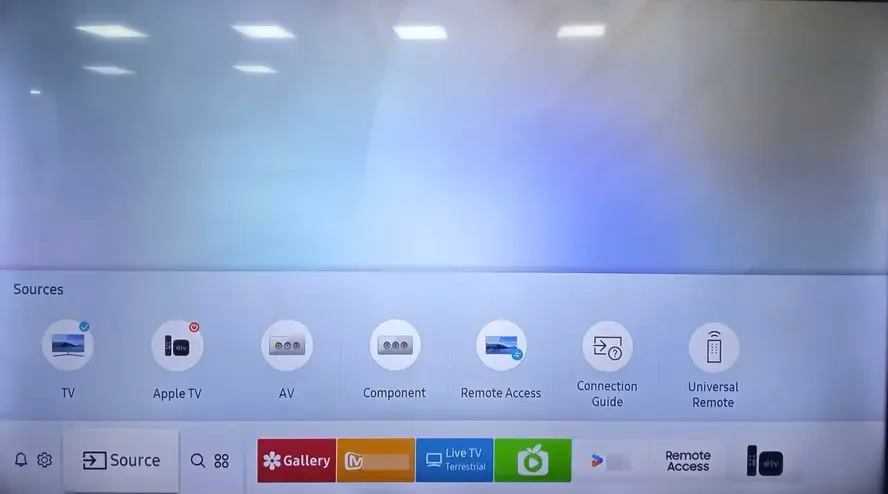
You should now see the Roku logo or welcome screen on your TV. If your TV show "No Signal", you need to:
Step 4. Complete the On-Screen Setup Process
Your Roku remote should pair automatically with your Roku device. You might see a message on screen confirming the connection. If the remote doesn't pair right away, press and hold the pairing button inside the battery compartment until the light starts flashing.
Then, you can navigate your Roku screen using the remote and complete the step with the on-screen instructions:
This part takes just a few minutes, and Roku will walk you through it step by step.
What to Do After Roku to TV Connection
Once your Roku device is connected and running, you can do more than just stream shows. There are a few handy ways to make your viewing experience even smoother:
Turn Your Smartphone into Roku Remote
You can control your Roku directly from your smartphone. BoostVision designed a free and powerful remote app for all Roku OS devices, including Roku Express, Ultra, Stick, and TVs. Just download the Roku TV remote app from the App Store or Google Play, and you'll be able to navigate menus, adjust the volume, and launch apps right from your phone.
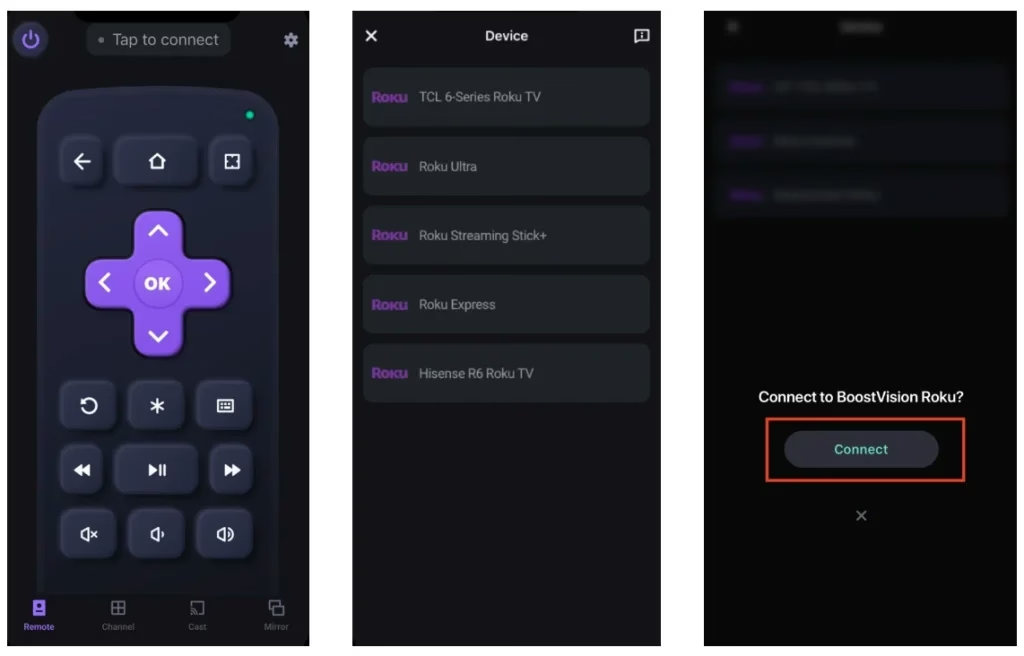
Download Remote for Roku TV
Share Connect from Your Phone to Roku
How to view phone screen or content on Roku? It's easy to mirror your screen to Roku with the dedicated Roku Screen Mirroring app, whether you're using an iPhone or Android. This is great for showing photos, videos, or even presentations on the big screen.

Download Screen Mirroring: TV Cast App
How to Connect Roku to TV Without HDMI
If you have an older or non-HD TV without HDMI ports, you might be wondering if you can still use your Roku. The good news is: yes, it's possible, but it depends on your Roku model and a few extra accessories.
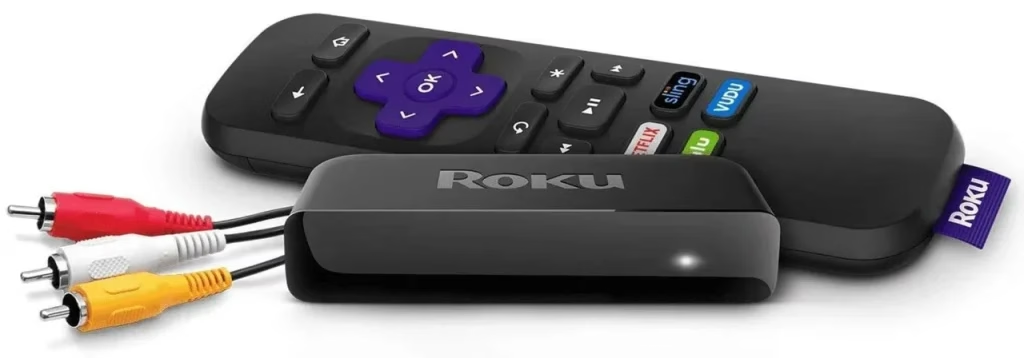
The easiest solution is to use a Roku Express+, which was designed specifically to work with older TVs. It includes composite (red, white, yellow) AV cables in addition to HDMI, so you can connect it to TVs without HDMI ports. However, this model is no longer in production, so you'll likely need to find it from third-party sellers or a refurbished marketplace.
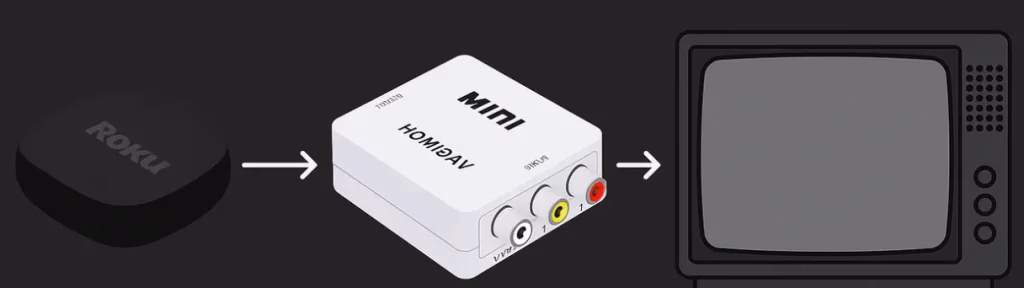
If you already own a Roku that only supports HDMI, your next best option is to use an HDMI to AV converter. This small device converts this digital HDMI signal from the Roku into an analog signal your older TV can recognize through its AV ports. Just make sure to choose a powered converter for the most reliable signal.
However, these workarounds may not deliver the same HD video quality or responsiveness as a direct Roku to TV HDMI connection. If your TV is particularly old, this might be a good opportunity to upgrade to a newer model with HDMI support. Many models of TVs come with built-in Roku OS, such as TCL, Hisense, JVC, Haier, Westinghouse, etc.
Conclusion
Setting up a Roku with HDMI is one of the easiest ways to start streaming on your TV. Just plug it in, connect to Wi-Fi, and you're good to go. If you run into any issues, don't worry; they're usually simple to fix.
Enjoy your new Roku setup, and don't forget to explore all the extra features that can make your viewing experience even better.
How to Connect Roku to TV with HDMI FAQ
Q: Can you use Roku on a non-Smart TV?
Yes. As long as your TV has an HDMI port, it doesn't need to be a Smart TV. Roku turns any display into a smart streaming device. All the apps and content run through Roku itself.
Q: What HDMI port should I use for Roku?
You can use any available HDMI port on your TV to connect your Roku device. TVs often have multiple HDMI inputs labeled as HDMI 1, HDMI 2, HDMI ARC, etc. Just remember which one you plug the Roku into, then switch your TV's input to that same HDMI number using your TV remote.
Q: Why is Roku not connecting to my TV?
If your Roku isn't showing up on the screen or says "No Signal", it could be due to a few common reasons: wrong input selected, loose or faulty HDMI connection, power issues, and TV compatibility or resolution mismatch. If your Roku is not connecting to your TV, try restarting both devices. If the problem persists, test the Roku on another TV to rule out hardware issues.